Showing posts with label recipes. Show all posts

Tuesday, September 9, 2008

Cooking again--Banana Bread

After a lapse of about 9 months, I have finally started to do some cooking again! My first foray back into the kitchen was to bake 2 loaves of banana bread one Friday afternoon. I baked the 2 loaves (one with chocolate chips) and left them on the counter to cool while I met up with a friend. When I came home about 3 hours later, the chocolate chip loaf was almost entirely gone, and D was lying on the loveseat holding his belly. Yes, my husband had eaten an entire loaf (just about) of chocolate chip banana bread! D is generally a very healthy eater, but he does have his weaknesses--if there are sweets, baked goods, or Ben & Jerry's in the house he has no control over the quantity he eats! Whole pints of Ben & Jerry's disappear in a matter of minutes, a box of thin mint girl scout cookies might last 2 days, and banana bread vanishes in a flash.

Here's the recipe for the magical disappearing banana bread.

2-3 overripe bananas (the browner the better), mashed
1/2 c. canola oil
1 c. white sugar
1 egg
3 tbs. milk
1/2 tsp. vanilla
1 1/2 c. flour (I use white whole wheat or AP)
1/2 tsp. salt
1 1/2 tsp. baking soda
1/2 c. chopped nuts (walnuts or pecans) or chocolate chips

Preheat oven to 350 F.
Mix all ingredients well by hand.
Pour into greased and floured loaf pan.
Bake 1 hour to 1 hour and 20 minutes (depending on the pan and the oven--I used to do the full time, but with my current pans and oven just an hour seems to do the trick--more than that and it's too dark).

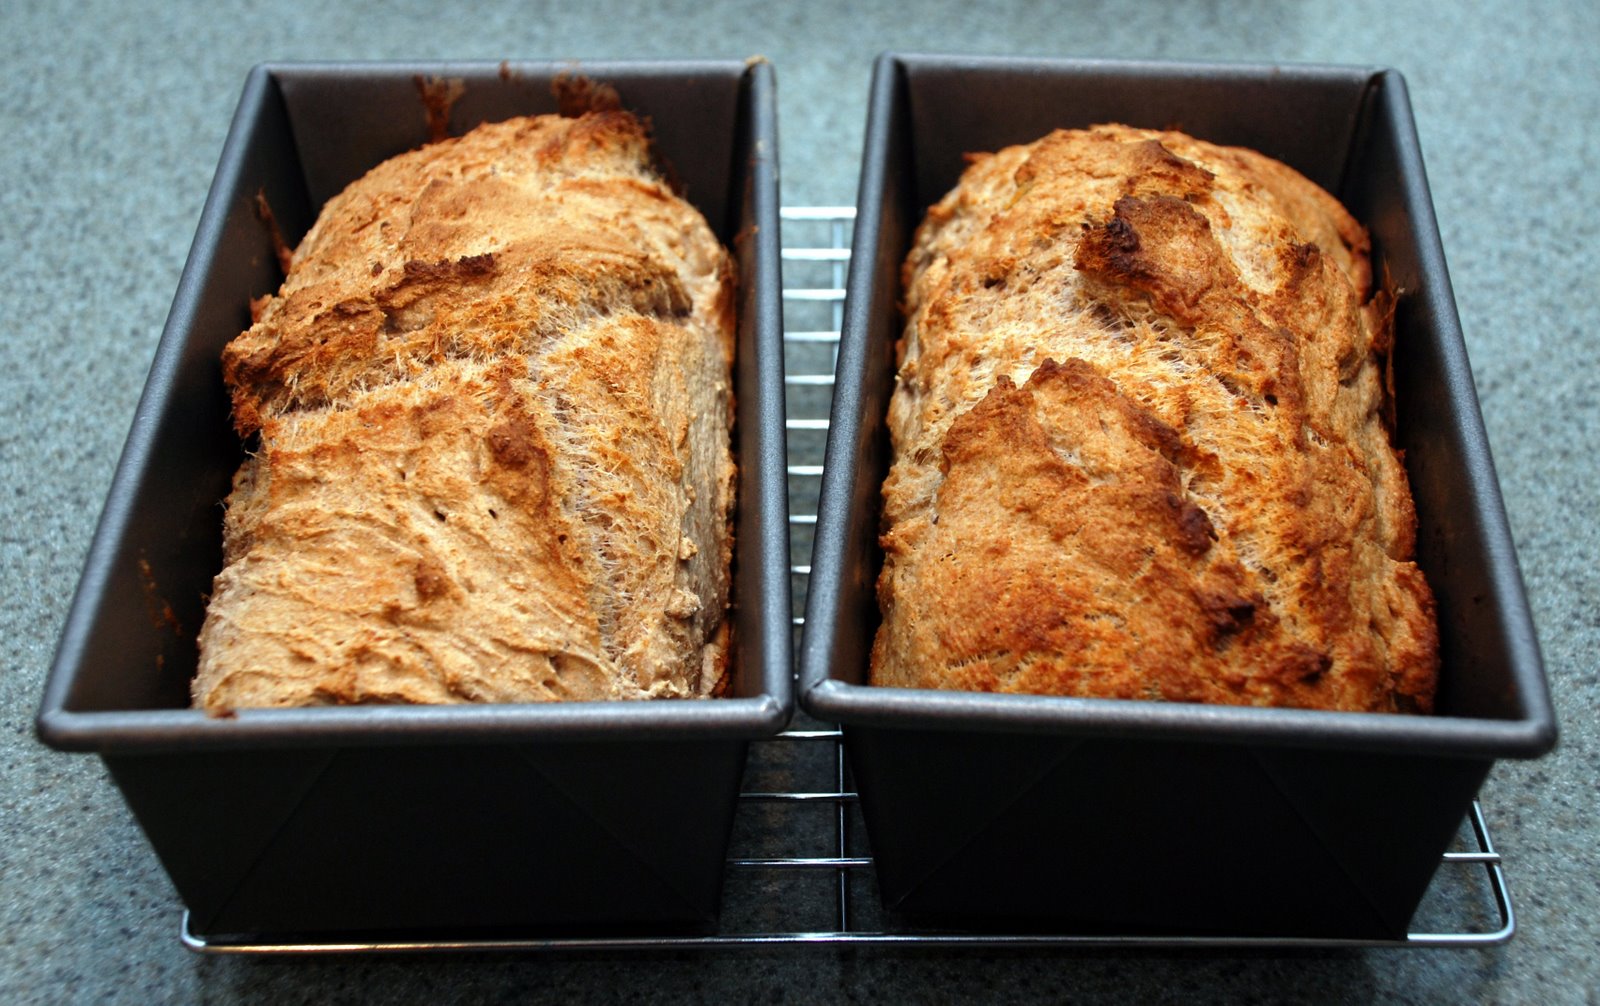
Here's a picture of the banana bread I made about a week later (someone bought bananas and then didn't eat them all week--I think he wanted me to make more banana bread).

Monday, January 28, 2008

Lemon Meringue Pie: Daring Bakers January Challenge

In my family, my sister is the pie baker. She’s amazing. We have a family friend who brings my sister big piles of rhubarb from his garden so she’ll make pies for him. If Beth’s making pies, she’ll always make multiples. My sister just has a knack for rolling dough—probably because she has the patience of a saint (which helps her a lot because she has 2 little boys). I, on the other hand, was born with very little patience which is one of the reasons I make crisps and cobblers instead of pies.

So, I was a little apprehensive about the January Daring Bakers challenge, but I was well prepared for it thanks to a little thing called the Williams-Sonoma Wedding Registry. I have a beautiful blue pie plate, and a fabulous birch pastry board.

One of the neatest things about Daring Bakers is that we have a blog (accessible to members only) where we can post about the problems we encounter making our recipes and can offer suggestions to others on how to avoid these problems. This helps tremendously. For this particular recipe many bakers seemed to have trouble keeping their filling firm—for many it became ”watery.” I read some of the suggestions people offered and without changing the original recipe, I was able to make a non-watery filling.

The first thing I did after reading the recipe, and the hints, was to reorganize the recipe so that the ingredients list and instructions for each of the 3 components of the pie were on the same page. I’ve re-ordered the recipe below in this same way. It’s not very helpful for making a shopping list, but it was a big help in the baking process.

Before I began, I also noted which ingredients needed to be cold and which at room temperature. I put the cold items in the fridge (all of the crust ingredients), and placed everything else on the counter to come to room temperature (hint: lemons will yield more juice at room temp). Another note about temperature is that I was under a deadline (bringing the pie to a dinner party that night), so I didn’t have time to cool the crust thoroughly before pouring in the lemon filling. Nor did I have time to thoroughly cool the filling before piling on the meringue. This didn’t seem to be a problem, and in fact, baking the meringue with the filling still very warm may have helped the filling stay firm instead of becoming watery.


Making the crust was much easier than I had expected. First of all, I married a man with his own food processor. Second, I had only ever made crust with shortening, not butter. Never again!

The dough came out quite well and I was able to form it into a nice disk for refrigerating.


After refrigerating, I really didn’t have any problems rolling the dough.
I may have rolled it a bit thick, but it fit nicely in my plate (and I was able to eat the scraps—tasted like sugar cookie dough!) Not having pie weights, I filled the crust with dried beans to bake, per the recipe.

I baked the crust as instructed until the edges of the crust were light brown. It probably could have used an extra couple of minutes because the bottom was so thick, but it turned out fine.

For the filling, I measured out my ingredients, separated my eggs, etc. For the lemons, I started by zesting with my microplane grater—I think I zested 2 lemons. Then, I used a zester to create lemon peel curls to use to garnish my pie.


Once my zesting was all finished, I rolled each lemon on the counter applying medium pressure. Lemons will provide more juice if rolled like this. I believe I used 4 lemons, maybe 4 ½.


I’m very glad that the filling instructions indicate that you need to bring the cornstarch/water mixture to a boil and stir until very thick. I was worried at first that my cornstarch was expired or something because it wasn’t thickening, but then it became very gloppy. I knew it was done! I added the other ingredients as stated in the recipe, with one exception. Before adding the butter I melted it in the microwave so that I would be adding hot liquid butter to the hot liquid mixture instead of adding solid room temperature butter. This may have also helped my filling stay firm, but I don’t really know. I think I got the idea from consulting “On Food and Cooking,” but I’m not sure whether it was in the section on egg-based sauces or custards or somewhere else.


I followed the instructions for the meringue to the letter.


Then I baked it for 15 minutes and it came out great!

Once the pie was out of the oven I sprinkled the top with the strips of lemon zest. The whole process took me 3 ½ hours, but it was worth it.
I brought my pie to one of my husband’s co-worker’s house that night. Everyone there loved it, and D said he liked it even better than the Bostini from October. He thought it was a nice flavor foil to the spicy Indian food we had for dinner.

In conclusion, I’ll definitely be baking this pie again, though probably only for special occasions since it is a little time intensive. I think I will also check out the cookbook “Wanda’s Pie in the Sky” for more recipes—this one was that good! To see the Lemon Meringue Pies made by the other Daring Bakers, visit our blogroll: http://daringbakersblogroll.blogspot.com/.

Lemon Meringue Pie
(From Wanda’s Pie in the Sky by Wanda Beaver)
Makes one 10-inch (25 cm) pie

For the Crust:
¾ cup (180 mL) cold butter; cut into ½-inch (1.2 cm) pieces
2 cups (475 mL) all-purpose flour
¼ cup (60 mL) granulated sugar
¼ tsp (1.2 mL) salt
⅓ cup (80 mL) ice water

For the Crust:
Make sure all ingredients are as cold as possible. Using a food processor or pastry cutter and a large bowl, combine the butter, flour, sugar and salt. Process or cut in until the mixture resembles coarse meal and begins to clump together. Sprinkle with water, let rest 30 seconds and then either process very briefly or cut in with about 15 strokes of the pastry cutter, just until the dough begins to stick together and come away from the sides of the bowl. Turn onto a lightly floured work surface and press together to form a disk. Wrap in plastic and chill for at least 20 minutes.

Preheat oven to 350ºF (180ºC).Allow the dough to warm slightly to room temperature if it is too hard to roll. On a lightly floured board (or countertop) roll the disk to a thickness of ⅛ inch (.3 cm). Cut a circle about 2 inches (5 cm) larger than the pie plate and transfer the pastry into the plate by folding it in half or by rolling it onto the rolling pin. Turn the pastry under, leaving an edge that hangs over the plate about ½ inch (1.2 cm). Flute decoratively. Chill for 30 minutes.

Line the crust with foil and fill with metal pie weights or dried beans. Bake for 20 to 25 minutes. Carefully remove the foil and continue baking for 10 to 15 minutes, until golden. Cool completely before filling.

For the Filling:
2 cups (475 mL) water
1 cup (240 mL) granulated sugar
½ cup (120 mL) cornstarch
5 egg yolks, beaten
¼ cup (60 mL) butter, melted
¾ cup (180 mL) fresh lemon juice
1 tbsp (15 mL) lemon zest
1 tsp (5 mL) vanilla extract

For the Filling:
Bring the water to a boil in a large, heavy saucepan. Remove from the heat and let rest 5 minutes. Whisk the sugar and cornstarch together. Add the mixture gradually to the hot water, whisking until completely incorporated.

Return to the heat and cook over medium heat, whisking constantly until the mixture comes to a boil. The mixture will be very thick. Add about 1 cup (240 mL) of the hot mixture to the beaten egg yolks, whisking until smooth. Whisking vigorously, add the warmed yolks to the pot and continue cooking, stirring constantly, until mixture comes to a boil. Remove from the heat and stir in butter until incorporated. Add the lemon juice, zest and vanilla, stirring until combined. Pour into the prepared crust. Cover with plastic wrap to prevent a skin from forming on the surface, and cool to room temperature.

For the Meringue:
5 egg whites, room temperature
½ tsp (2.5 mL) cream of tartar
¼ tsp (1.2 mL) salt
½ tsp (2.5 mL) vanilla extract
¾ cup (180 mL) granulated sugar

For the Meringue:
Preheat the oven to 375ºF (190ºC). Using an electric mixer beat the egg whites with the cream of tartar, salt and vanilla extract until soft peaks form. Add the sugar gradually, beating until it forms stiff, glossy peaks. Pile onto the cooled pie, bringing the meringue all the way over to the edge of the crust to seal it completely. Bake for 15 to 20 minutes, or until golden. Cool on a rack. Serve within 6 hours to avoid a soggy crust.

Wednesday, January 23, 2008

The Best Molasses Cookies

The Sunday before Christmas I was a baking madwoman. I made a double batch of Chex Mix (my grandma always made it for Christmas), a pan of Rice Krispie Treats (for my nephews), a pan of magic bars, and a batch of molasses cookies.

The molasses cookie recipe is from Epicurious, but I first learned of this recipe from Cookie Madness--if you love cookies and don't read this blog you've been missing out. Marye at Baking Delights has her version of this recipe too!

These cookies are crisp on the outside and chewy on the inside. I rolled my cookies in turbinado sugar before baking (a Cookie Madness suggestion) and the crunch of the large-grained sugar is so good! I think they taste like Pepperidge Farms Gingermen cookies (which my mom would send to me at summer camp), only better. I had D deliver a package of these cookies to each of our neighbors on Christmas morning.

Below is the recipe from Epicurious with my modifications:

Molasses Cookies
(Originally from Gourmet November 1995)

Servings: Makes about 25 very large cookies (or 50 normal-sized cookies)
4 cups all-purpose flour
1/2 teaspoon salt
2 1/4 teaspoons baking soda
2 teaspoons ground ginger
1 1/4 teaspoons ground cloves
1 1/4 teaspoons cinnamon
1 stick (1/2 cup) unsalted butter, softened
1 stick (1/2 cup) margarine
3 cups sugar
1/2 cup unsulfured molasses
2 large eggs
1/2 cup turbinado sugar, sugar in the raw, or regular white sugar

Preheat oven to 325°F and lightly grease 2 large baking sheets (or line with parchment paper).
In a large bowl whisk together flour, salt, baking soda, ginger, cloves, and cinnamon.

In another large bowl with an electric mixer beat together butter, margarine, and 3 cups sugar until light and fluffy and beat in molasses. Beat in eggs, 1 at a time, beating well after each addition. Gradually beat in flour mixture and combine well.

In a small shallow bowl put remaining 1/2 cup sugar. Form dough into 2-inch balls and roll in sugar. On baking sheets arrange balls about 4 inches apart and flatten slightly with bottom of a glass dipped in sugar. (1 inch balls yield regular sized cookies...just cook for a slightly shorter amount of time)

Bake cookies in batches in middle of the oven 15 minutes, or until puffed and golden. Cookies should be soft. Transfer cookies with a metal spatula to racks to cool.

Note: I don't typically use margarine in anything, but margarine tends to give cookies a chewier texture than all butter. I haven't tried these with all butter. Oh, and in the original recipe it lists in the ingredients 3 1/2 cups of sugar and it doesn't say "divided" so I put all 3 1/2 cups into the cookie dough and then used another 1/2 cup of sugar to roll the cookies in. The cookies came out fine, but it's yet another reminder to me to read the entire recipe before starting to cook!!! Oh, and next time I bake these I'll take a nice picture of the finished cookies. To see a close up picture from Cookie Madness, click here.

Saturday, January 19, 2008

Swedish Style Turkey Meatballs

When I was a pre-teenager, I went through a phase where I would not eat red meat. I'm not sure exactly how or why this started, though perhaps it was at summer camp. In any case, my mom was pretty supportive of this even though it meant that I often wouldn't eat what was being served for dinner. In many households a non-red meat eater might not be a big deal, but in my household we had beef or pork 5-6 times per week for dinner. You see, my father is allergic to poultry so chicken was a "treat" that we would have only when dad was away on business trips. But I digress. In any case, I went though a non red meat phase which meant that hamburgers became turkey burgers.

I haven't had ground turkey in a long time, but when I was at my new favorite grocery store on Saturday, I bought 2 packages of ground turkey since it was buy one get one free. I thought to myself, "turkey is healthy*" so I should use it instead of beef in meatloaf, chili, etc. Upon arriving home, I checked Epicurious for some ground turkey recipes. The first one I came upon that sounded good was Turkey Swedish Meatballs. Perfect--in fact, D is 1/4 Swedish.

I made the meatballs on Tuesday night. From beginning to end the recipe took about 1.5 hours, but would have been about 15 minutes less if I had put the water on to boil for the noodles earlier. The original recipe is here, but I modified it a little bit because of what I did and did not have on hand.

Swedish Style Turkey Meatballs with Egg Noodles
from Epicurious (originally from Gourmet, April 1998)

For Meatballs:
4 slices firm white sandwich bread (I used leftover Challah)
1 medium onion
1 large egg
1/4 teaspoon freshly grated nutmeg
1 teaspoon ground allspice (in the future I would use a little less)
1 teaspoon salt
1/2 teaspoon freshly ground black pepper
1 3/4 pounds lean ground turkey (I used 1 1/4 because that's what I had)
1 teaspoon vegetable oil

3/4 pound cholesterol-free egg noodles such as No Yolks

For Sauce:
1 small onion
2 1/2 tablespoons cornstarch
3 cups beef broth (24 fluid ounces)
3 tablespoons medium-dry Sherry
1 tablespoon Worcestershire sauce
1 tablespoon nonfat sour cream (I used regular Greek yogurt, a big heaping tablespoon)
2 tablespoons chopped fresh dill leaves (I left this out--I didn't have any on hand)

Garnish:
chopped fresh dill leaves (again, I left this out)

Accompaniment:
1/2 cup lingonberry preserves or cranberry sauce (I used canned cranberry sauce)

Make meatballs:
Into a blender/food processor tear 2 bread slices and grind into fine crumbs. Transfer crumbs to a large bowl. Make more bread crumbs in same manner and transfer to bowl. Finely chop enough onion to measure 3/4 cup (I used the food prpocessor to grate onion since I had it out for the bread crumbs) and add to bread crumbs. In a small bowl whisk together egg, nutmeg, allspice, salt, and pepper and add to bread crumb mixture. Add turkey and with your hands mix mixture until just combined (do not overmix).
Form turkey mixture into 1 1/4-inch balls (about 80--mine was about 30) and arrange on a tray. Meatballs may be prepared up to this point 1 day ahead and chilled, covered.

Preheat oven to 375°F.

In a 12-inch non-stick skillet heat oil over moderately high heat until hot but not smoking and brown meatballs in 2 batches, turning them occasionally, about 4 minutes for each batch. With a slotted spoon transfer meatballs as browned to a shallow baking pan and reserve any drippings in skillet. Bake meatballs, tightly covered with foil, in middle of oven until just cooked through, about 25 minutes. (I lined the bottom part of a broiler with foil and then cooked the meatballs on the top of the broiler pan, covering the meatballs with foil).

While meatballs are baking (better yet, before you put them in the oven), fill a 6-quart saucepan three fourths full with salted water and bring to a boil for noodles.

Make Sauce:
Finely chop enough onion to measure 1/2 cup. In a small bowl whisk together cornstarch and 1/2 cup broth (I heated my broth in the micro first). To reserved drippings in skillet add Sherry and onion and simmer mixture, stirring and scraping up brown bits, until most of liquid is evaporated. Add remaining 2 1/2 cups broth and bring to a boil. Stir cornstarch mixture and whisk into broth mixture. Boil mixture, whisking, 1 minute (look at the clock)and remove skillet from heat. Whisk in Worcestershire sauce, sour cream, and dill and keep sauce warm, covered, over low heat (do not let boil). (Add salt to taste in the sauce, mine could have used a little).

When there's about 15 minutes left on the timer for the meatballs, cook noodles in boiling water until al dente. Drain noodles well in a colander and transfer to a large serving dish. Gently toss noodles with sauce and meatballs and garnish with dill. Put 1 tablespoon preserves or cranberry sauce on top of each serving.

I really liked this recipe. It produced a lot of dishes for D to wash, but I think it was worth it. Also, these were lots of leftovers which I froze.

*Incidentally, I checked the nutrition information for ground beef vs. ground turkey.

For 1/4 lb (raw) here's the info for 93% lean ground turkey (from the Jennie-O package):
Calories: 170
Fat: 8 grams
Saturated Fat: 2.5 grams
Cholesterol: 80 mg
Sodium: 80 mg
Protein: 23 grams
Iron: 6% daily value

And for 1/4lb ground beef 95% lean (from Calorie-Count.com):
Calories: 148
Fat: 6 grams
Saturated Fat: 2.25 grams
Cholesterol: 69 mg
Sodium: 65 mg
Protein: 22.5 grams
Iron: 14% daily value

Typically I buy 93% lean ground beef rather than 95%, but for most things I think I'm going to stick with ground beef instead of ground turkey. The iron is a good thing for me, plus, I like the taste of beef.


Wednesday, December 19, 2007

Christmas Cookies

In the past 2 weeks I've started making my Christmas cookies. First, I made creme de menthe brownies for a cookie swap. I don't use a recipe, I just make up a batch of fudgie brownies (my grandmother's recipe), ice them with buttercream frosting that's been tinted green and spiked with creme de menthe, and then coat them with chocolate (semi-sweet chips and some butter melted).

The second cookies I made are peanut butter balls. This is a heavily guarded recipe that originally came from my neightbor/my best friend's step-father's ex-wife. My friend Amanda makes these every year and we call them Mandy's Candies. The recipe is out there all over the place in the Internet, so I don't need to post it here and risk upsetting the balance of the universe of my old neighborhood.


Finally, I made sugar cookies. My sister is the queen of cut-out sugar cookies. She makes them for every holiday, bridal showers, etc. She's also a great pie baker. I don't have a lot of patience for rolling out dough (or a lot of time), so I made our grandmother's sugar cookie recipe, rolled it into a log, chilled it for a couple days, and then sliced and baked. They came out approximately round, and I knew that they would look great iced. Here is the recipe:

I also made up a 3/4 batch of my grandmother's christmas cookie icing. Techinically I guess it's royal icing, but I always refer to it as Christmas cookie icing. The icing gets very hard, and I love the combination of soft cookie with a coating of hard icing on top. When I was a kid, my grandmother always made sugar cookies like that. I can still picture her pink-clad santas (I have that cookie cutter now). The santas were pink because she used liquid food coloring and it takes a whole lot of liquid food coloring to dye icing red. These days I use gel food coloring and am able to get more of a red color.

I simply use a ziplock bag instead of a pastry bag for most of my decorating needs. It's easy and disposable--just fill with colored icing and snip a very small hole in the corner. For the holly leaves I did use a pastry bag and tip, but the disposable pastry bag split at the seams before I was finished--I had green icing all over my hands!Here's the recipe for the icing (Doris Arnold is my grandmother):
The recipes are from this cookbook:
I made it a number of years ago by covering a blank book with cut outs from magazines (and the Williams Sonoma catalog). I covered the whole thing with contact paper, and even included measurement equivalents table inside the front cover. I love this little book. It contains my favorite family recipes (banana bread, brownies, cranberry bread, cookie recipes, coffee cake, etc.) as well as some of the recipes I've cut out of magazines. I've always loved cutting and pasting!!!
Saturday, December 1, 2007

Daring Bakers: Tender Potato Bread


I bit off more than I could chew in November. First, I signed on to do a blog challenge of organizing my office. Well, that wasn't so successful (though it's much better than it was). Then we celebrated my grandmother's 90th birthday and a week later celebrated by husband's grandmother's 90th birthday. Then it was Thanksgiving! By Thanksgiving night I was totally pooped! But, I still needed to complete my November Daring Bakers challenge!

I started the recipe at about 5pm on Saturday evening (not the best time to start a yeast bread, especially when you hosted 12 people for dinner 2 days earlier). I cooked the potatoes and kind of forgot about them on the stove (I'm a space cadet), so by the time I got to them they had largely become one with the cooking water. Now, I don't have a baking scale (maybe Santa will bring me one?) so I used 3 big potatoes--perhaps that was too many. I measured my potato water and I just about had 3 cups so just added a little extra water to it.

I followed the recipe, adding yeast, all purpose flour, and wheat flour and floured by counter top (I have a beautiful board given to me by D's cousins, but I hadn't
used it yet so needed to oil it before the first use and I just didn't have time for that). The dough was extremely sticky, but I figured this was how it was supposed to be. I kept kneading in flour until I ran out of all purpose flour (I hadn't measured before I started, I just assumed I had enough). The dough was still extremely sticky, so I kneaded in some whole wheat flour--not sure how much. Then I put the dough into a bowl, covered it with a towel, and set it on the mantel of our gas fireplace to rise. Then...I fell asleep!
Yes, in the midst of my bread-making, I fell asleep on the sofa. I woke up around 10 and realized I had to finish the bread! So, back to kneading, and it was still soooo sticky. I definitely think I over kneaded though. It was sticky and I was tired, so I buttered up 2 pans and a muffin tin and threw the dough in them (it was so sticky there was no "shaping" my loaf). Then I stuck the bread in the oven and set the timer for 10 minutes. When the timer dinged I stuck the muffin tin in the oven.

When the bread was done it looked nice, but man did it feel dense! I cut open one of the "rolls" to see what it was like. Okay, but dense. I ate it with some honey.On Sunday I was re-reading the recipe and that's when I saw it: "Cover with plastic wrap and let rise for 35 to 45 minutes, until puffy and almost doubled in volume." Oops! I forgot to let it rise in the pans before baking!!! So a combination of using more whole wheat flour than called for, over-kneading, and not doing the second rise made the bread very dense. But, I am pleased to report it still tasted very good. perfect with jam or honey on it, or to dunk in soup. I also made a very good "Pilgrim Sandwich" with it. Yum!

Lessons learned:
1) Measure all ingredients before starting in case you need to run out to the market
2) When instructions are given my weight, use a scale. Don't guess
3) Don't make a new recipe when you're tired, and don't start so late that you won't finish until past your bedtime
4) Read the entire recipe and make sure you understand the instructions before you begin

Oh, and the "Mrs." apron I'm wearing? That was a gift from my wedding caterer, Fine Catering by Russell Morin. If you need a caterer in Rhode Island or Massachusetts I very highly recommend them!

Here's the recipe if anyone would like to try it:

Tender Potato Bread

From Home Baking: The Artful Mix of Flour & Tradition Around the World
Jeffrey Alford and Naomi Duguid

Makes 1 large tender-crumbed pan loaf and something more (I made 2 8x4 loaves and 1 dozen muffin-tin rolls).

Potatoes and potato water give this bread wonderful flavor and texture. The dough is very soft and moist and might feel a little scary if you’ve never handled soft dough before. But don’t worry: Leaving it on parchment or wax paper to proof and to bake makes it easy to handle.

Once baked, the crumb is tender and airy, with ting soft pieces of potato in it and a fine flecking of whole wheat. The loaves have a fabulous crisp texture on the outside and a slightly flat-topped shape. They make great toast and tender yet strong sliced bread for sandwiches.

Ingredients:

4 medium to large floury (baking) potatoes, peeled and cut into chunks variety of potatoes you might want to use would include Idaho, Russet & Yukon gold

For the beginner I suggest no more than 8 ounces of potato; for the more advanced no more than 16 ounces.

4 cups water (See Note)
1 tablespoon plus 1 teaspoon salt
2 teaspoons active dry yeast
6 ½ cups to 8 ½ cups unbleached all-purpose flour
1 tablespoon unsalted butter, softened
1 cup whole wheat flour

Topping:
For Loaves and Rolls: melted butter (optional)

Instructions:
Put the potatoes and 4 cups water in a sauce pan and bring to boil. Add 1 teaspoon salt and cook, half covered, until the potatoes are very tender.

Drain the potatoes, SAVE THE POTATO WATER, and mash the potatoes well.

Measure out 3 cups of the reserved potato water (add extra water if needed to make 3 cups). Place the water and mashed potatoes in the bowl you plan to mix the bread in and let cool to lukewarm – stir well before testing the temperature – it should feel barely warm to your hand. You should be able to submerge you hand in the mix and not be uncomfortable.

Add yeast one of two ways:

Mix & stir yeast into cooled water and mashed potatoes & water and let stand 5 minutes. Then mix in 2 cups of all-purpose flour and mix. Allow to rest several minutes.
OR

Add yeast to 2 cups all-purpose flour and whisk. Add yeast and flour to the cooled mashed potatoes & water and mix well. Allow to rest/sit 5 minutes.

Sprinkle on the remaining 1 tablespoon salt and the softened butter; mix well. Add the 1 cup whole wheat flour, stir briefly.

Add 2 cups of the unbleached all-purpose flour and stir until all the flour has been incorporated.

At this point you have used 4 cups of the possible 8 ½ cups suggested by the recipe.

Turn the dough out onto a generously floured surface and knead for about 10 minutes, incorporating flour as needed to prevent sticking. The dough will be very sticky to begin with, but as it takes up more flour from the kneading surface, it will become easier to handle; use a dough scraper to keep your surface clean. The kneaded dough will still be very soft.

As a beginner, you may be tempted to add more flour than needed. Most/many bread recipes give a range of flour needed. This is going to be a soft dough. At this point, add flour to the counter slowly, say a ¼ cup at a time. Do not feel you must use all of the suggested flour. When the dough is soft and smooth and not too sticky, it’s probably ready.

Place the dough in a large clean bowl or your rising container of choice, cover with plastic wrap or lid, and let rise about 2 hours or until doubled in volume.

Turn the dough out onto a well-floured surface and knead gently several minutes. It will be moist and a little sticky.

Divide the dough into 2 unequal pieces in a proportion of one-third and two-thirds (one will be twice as large as the other). Place the smaller piece to one side and cover loosely.

To shape the large loaf:

Butter a 9X5 inch loaf/bread pan.

Flatten the larger piece of dough on the floured surface to an approximate 12 x 8 inch oval, then roll it up from a narrow end to form a loaf. Pinch the seam closed and gently place seam side down in the buttered pan. The dough should come about three-quarters of the way up the sides of the pan. Cover with plastic wrap and let rise for 35 to 45 minutes, until puffy and almost doubled in volume.

To make a small loaf with the remainder:

Butter an 8 x 4 inch bread pan. Shape and proof the loaf the same way as the large loaf.

Dust risen loaves and rolls with a little all-purpose flour or lightly brush the tops with a little melted butter. Slash loaves crosswise two or three times with a razor blade or very sharp knife and immediately place on the stone, tiles or baking sheet in the oven. Place the rolls next to the loaf in the oven.

Bake rolls until golden, about 30 minutes.
Bake the small loaf for about 40 minutes.
Bake the large loaf for about 50 minutes.

Transfer the rolls to a rack when done to cool. When the loaf or loaves have baked for the specified time, remove from the pans and place back on the stone, tiles or baking sheet for another 5 to 10 minutes. The corners should be firm when pinched and the bread should sound hollow when tapped on the bottom.

Let breads cool on a rack for at least 30 minutes before slicing. Rolls can be served warm or at room temperature.
Interested in being a Daring Baker? Check out the blogroll site for information on joining the group, and check out all of the other Daring Bakers' blogs!

Wednesday, November 21, 2007

Gravy, Stock, and a Science Lesson

So, now that I've covered the turkey and the stuffing, it's time to get into the gravy. My husband says his family is more of a cranberry sauce family, but my family is all about gravy! Gravy can be messy to make, and it has to be done on the stove top after the turkey comes out of the oven, so I decided to make mine in advance. I made it on Sunday and pulled it out of the freezer this morning to thaw for tomorrow. Here's the approximate recipe. Again, like with stuffing you don't need to be too precise.

Turkey Gravy

Pan drippings from a turkey cooked on the bottom of the pan (not on a rack)
flour--about 3 tablespoons
chicken or turkey stock--about 2 cups
water--about a cup or so
sea salt and freshly ground pepper
skin from the turkey you just cooked
herbs and bacon from under the skin of the turkey you just cooked

Start by putting the roasting pan containing the drippings on the stove over low heat. Skim off some of the fat so you have maybe 3 tablespoons left (no need to be precise). Add flour a tablespoon at a time as if you were making a roux (which is what you're doing, only with turkey fat instead of butter). Stir the turkey fat, browned bits from the bottom of the an, and flour together until smooth. Turn the heat to medium and add the chicken stock. Stir until smooth and there are no lumps of flour/roux. Add some water to thin it out a little. Add some skin from the turkey for more flavor (remember the turkey skin was covered with bacon grease and salt and pepper). Scrape the herbs and diced bacon off of the turkey and add that too. Simmer until very fragrant and of a good gravy consistency. If it gets too thick, add some water. Strain the gravy through a sieve into a container or gravy boat. Enjoy!!!

Gravy is one of the major reasons people gain an average of 7 pounds between Thanksgiving and New Years!!!

After I made the gravy on Sunday, D and I sat down to a great lunch of turkey, corn muffin stuffin', gravy, and cranberry sauce. He came in from raking the leaves and was really happy to have a hot home cooked meal--a great pre-cursor to Thanksgiving dinner!

Oh, but I wasn't done yet. After making the turkey breast, stuffing, and gravy, there was still more to do! I had a beautiful turkey carcass just screaming to be made into stock. In my opinion, the slow cooker was invented for making stock! I picked all of the bits of meat off of the turkey and put them into a bowl in the fridge for later. Then, I broke the carcass apart and loaded the whole thing into the slow cooker along with a very coarsely chopped onion, about 1/2 a heart of celery (including leaves), the 10 or so baby carrots I had in the fridge, 2 cloves of garlic I peeled but didn't use for the turkey, and enough water to cover the whole thing. Then I set the slow cooker on low for the next 12 hours (and had it automatically switch to "keep warm" at 4am until 8 when I got up). Then, in the morning, I strained it all into a tupperware container. When I strain it, I like to pull out the veggies first and use the back of a spoon to smush them through the sieve. Then I pour the rest of the liquid through and strain out all of the bones.

Today I'm working from home, so for lunch I pulled out the turkey stock and leftover turkey bits for some soup. I used a spoon to remove the layer of fat from the top of the broth. Then I spooned the broth into a bowl. Well, more accurately I spooned the "turkey jell-o" into my bowl. I know that gelatin comes from animal bones and so this wasn't that surprising, but it was funny to see.


Turkey "Jell-o" with turkey on top (after I microwaved it, it turned into delicious trukey soup!)


Since I'm home, I just pulled out one of my favorite books about cooking "On Food and Cooking: The Science and Lore of the Kitchen" by Harold McGee to find out more about the gelatinization process. Here's what he says:

"Collagen is the major structural component of the simplest of many-celled animals, the sponges, and accounts for some 30% of the protein in the human body. It is found in the skin and tendons as well as in between muscle cells and muscles, and it is a large part of the matrix in young bones that is later filled with hard minerals. The name comes from the Greek for "glue producing," referring to the fact that when it is heated in water, insoluble collagen is transformed into gelatin, a soluble, gummy solution that can be used for glue as well as a thickener for soups and desserts."

Pretty cool stuff. If you don't have this book and you like to cook (or like science and eating), I highly recommend buying it or getting it out of the local library. It was recommended to me by Rich Herzfeld of Chef's Table in Westport, CT. I took my very first "real" cooking class from him and learned a tremendous amount (including adding brown sugar to food that is too spicy, making large amounts of roux and freezing it in small portions, and wilting cabbage leaves by sticking them in the freezer).

Tuesday, November 20, 2007

Scarborough Fair Stuffing and Corn Muffin Stuffin'

In addition to cooking a turkey breast on Sunday, I also made my stuffing. My family has always been a white bread and Bell's Seasoning stuffing family and while I mostly wanted to stick to tradition, I also wanted to do something a little different. Last week I happened upon the blog "The Pioneer Woman Cooks!," where Ree had posted beautiful step-by-step instructions for her corn bread stuffing. She made it look so incredibly good (and her commentary is great) that I just had to try it!

I made some modifications to her recipe including making my corn bread using a mix (horrors---I never used bread or brownie mixes until I discovered the ones at Trader Joe's), and using vegetable broth instead of chicken (I'm serving 2 vegetarians and 2 non-poultry eaters on Thursday). Also, I tend not to really measure anything--just eyeball it. This is stuffing after all--it doesn't need to be precise. Another modification I made came from a phone call with my mom while I was busy cooking on Sunday. We were talking about Thanksgiving and she mentioned that she had been watching the Food Network all week for new Thanksgiving ideas. One that she particularly liked was from Rachel Ray who made individual stuffing portions using muffin tins. I thought this was a fun idea, and so I did this with my cornbread stuffing--hence I named it Corn Muffin Stuffin'.


Here's the ingredient list for the stuffings I made (this makes LOTS of stuffing--a baking dish full of regular bread stuffing and 16 corn muffin stuffin's).

2 loaves of Pane Rustica (chewy crusty white bread from Trader Joe's)
1 8" square pan of baked corn bread (I used Trader Joe's mix)
1 large (softball sized) yellow onion
1 1/2 celery hearts
3/4 cup salted butter
3 cups vegetable broth (or use chicken if you don't have a dad who is allergic to it)
Fresh parsley, sage, rosemary, and thyme chopped (that's the Scarborough Fair part)
(I used about 1/4 cup parsley, 2 teaspoons thyme, a tablespoon or so of sage, and 2 teaspoons or so of rosemary--no need to be precise)
sea salt
freshly ground pepper

You can follow Ree's instructions with pictures here, or follow my instructions below which aren't as decorative.

Cut bread and cornbread into approx. 1"x 1" pieces and spread out on rimmed baking sheets. Bake at 200 degrees for about 1/2 hour--until it's dry (but not hard). Transfer about 3/4 of the white bread to a large bowl. Transfer 1/4 of the white bread and all of the corn bread to a second bowl. In a large skillet, melt butter. Add to it diced onion and diced celery. Let the onion and celery cook in the butter, stirring occasionally, until they are translucent and the bits stirred up from the bottom are starting to turn brown. Add stock. Simmer until hot. Add the herbs, plus salt and pepper to taste. Ladle 1/2 of the mixture over the bowl of white bread. Toss to coat. Pour into a buttered baking dish. And set aside. Ladle/pour the other half of the mixture over the white/cornbread mix. Toss to coat, and spoon into buttered muffin tins. Press the stuffing in (not too hard, you want it to stay in there, but you don't want it as hard as a rock), and mound a little on top so it looks like a muffin.

At this point, I covered the baking dish and the muffin tins in aluminum foil and stuck them in the freezer to bake and serve on Thursday. Of course, I had plenty and so I cooked some in a 350 oven for about 20-30 minutes and D and I ate it for lunch along with turkey and gravy. D loved the stuffing, as did I! Hope you do too!


Monday, November 19, 2007

Thanksgiving Prep--Turkey recipe

D and I are hosting thanksgiving for the first time this year. We will have 12 people in total including 2 90-year old women named Ruth and 2 dads who don't eat poultry! It will be the first time both of our families have been together since our wedding 6 months ago (6 months today!! Happy Anniversary D!). Luckily, D and I both have family members who like to cook so we've divvied up most of the meal for others to bring, and I decided to get as much as I could of my part of the meal done in advance. So that meant the liquor store and Trader Joe's on Saturday and cooking on Sunday!

I happened to be home sick last Wednesday with a killer cold (now on antibiotics for a sinus infection) and I watched Martha. Emeril was on and they made a turkey breast that looked so delicious! I used that recipe yesterday to cook a turkey breast so that I could make my Thanksgiving gravy in advance. I'm going to use the same recipe on Thursday when I cook my actual turkey. Here's the basic recipe as I followed it (and you can click here for the original on Martha's site).


Emeril's
Bacon and Herb Roasted Turkey Breast

5.67 lb fresh hotel style turkey breast (bone-in)
5 strips of bacon
3 Tbsp butter
1 Tbsp chopped fresh sage
3 garlic cloves, minced
2 tsp chopped fresh rosemary
1 tsp chopped fresh thyme
1 tsp chopped fresh oregano (I used some regular oregano and some Greek)
2 Tbsp sea salt
1 tsp fresh ground pepper

Preheat oven to 375. Rinse turkey breast and pat dry. Cook bacon in a skillet and reserve the grease. Soften the butter and add crumbled bacon, garlic, herbs, 1 tsp of the salt, and the pepper. Cream butter mixture to make a paste. Loosen the skin of the turkey with your hands and rub the meat with the butter mixture--make sure there is butter mixture between the skin and the meat all over the breast of the bird. Sprinkle salt and pepper inside the carcass. Baste the outside of the skin with the reserved bacon grease, and then generously cover with the remaining salt. Place the turkey, breast side up, in a roasting pan. If you want to make gravy, do not use a rack in the pan. Cook in a 375 over for about 1 hour 20 minutes until a thermometer reads 165 degrees (note: on my breast the timer didn't pop up when it reached 165. I think if I had cooked it until the timer popped up it would have been dry). Remove the bird from the oven and move to a platter or cutting board. Cover with foil and let rest for 20 minutes or so before slicing.

The skin on this turkey was unbelievably good--crispy and salty! I had to eat some right away! I'll post later today on the rest of the prep I did on Sunday. Stay tuned for recipes for gravy and stuffing!
Here's a picture of all of the fresh herbs I used for the turkey and stuffing. The the pots of herbs on my deck are still going strong despite heavy frost. I plan to use up just about all of the herbs on Thursday. One good trick for fresh herbs that I learned somewhere is to rinse them in cold water and then spin them in the salad spinner!
Oh, and it wouldn't be me if there wasn't a little mishap involved in this cooking. Sunday's casualty was a scorched oven mitt. I moved the skillet with the bacon in it off of the burner, but forgot to turn the burner off. I was chopping herbs and grooving along to James Taylor singing Shower the People (from his new album, played on Sunday Morning Over Easy, my favorite radio show), when suddenly I smelled something dreadful. Burning polyester smells awful, but I was so stuffed up that I didn't smell it until it was really smoking! Good thing it was a nice day (though 40 degrees) so I could open all of the windows!

Monday, October 29, 2007

Daring Bakers October Challenge -- Bostini Cream Pie


I belong to an online learning community called Daring Bakers. The deal is that we are assigned a recipe at the beginning of the month which we have to make exactly as the recipe states, and then post the results on our blogs. The recipe for October (my first month) is a "Bostini Cream Pie" A variation on the classic Boston Cream pie. The recipe appears at the bottom of my post.

First off, I halved the recipe since there's just D and I to eat it. I started by separating the eggs and realized I had separated too many. This was when I decided that when halving a recipe it's best to do all of the conversions first and write them down next to the name of the ingredient. This recipe was a bit of a pain to halve since there are a lot of 3/4 cups/tablespoons in it. Luckily, I remembered that my cookbook holder has all of the conversions written on it, such as how many tablespoons per cup for liquids and solid measures. This is why I wish we used the metric system in the U.S.-- it's so much easier for conversions of all kinds!

I had a little mishap when adding the beaten egg to the milk and egg yolk mixture. My hands were slippery and I accidentally dropped the beaten egg and the bowl it was in into the mixing bowl. I had my cream, vanilla bean, and sugar in a saucepan, brought it to a boil, turned the heat down, and then took some of the hot cream to temper the eggs. As soon as I put the egg mixture into the cream it started to curdle--fast. My pans retain so much heat! Luckily I had the spoon in hand and was able to start stirring right away so not too much curdle (and that's what the straining is for, right?).

Next little mishap was in straining the custard. When straining custard I recommend that you strain it into a bowl and then fill the custard cups from the bowl. Well, on Saturday I didn't do this--I strained straight from the hot and heavy saucepan right into the custard cups. Very messy--but I got to sample a lot of custard that fell onto the counter and the outside of the custard cups.

Third mishap is really a shame because it resulted in wasted custard. I didn't have enough custard cups, so I used a Pyrex bowl with lid for the last bit of custard. Unfortunately I didn't sniff the bowl before using it. All I can say is that I have one bowl of vanilla-onion infused custard. (We specifically store things in glass to avoid the smelly containers issue, but I guess this particular one didn't go through the dishwasher and wasn't washed with enough dish soap).

Now the cake pretty much went off without a hitch. The only issue was that I had neglected to buy the cake flour so I had to use all-purpose. The orange mixture smelled heavenly and reminded me of the smell of cranberry orange bread batter. The egg whites whipped up fabulously and the batter was so light once I folded it in. I spooned it into custard cups that I had wiped with a paper towel dipped in canola oil (I don't like cooking spray). Again, I was short a custard cup so I used another one of the Pyrex bowls, but this time I was smart enough to sniff it first.

The cakes came out of the oven all puffy and lightly browned. Beautiful! I waited until thay were cool and then used a knife to loosen the edges and popped the cakes out onto a cooling rack.

Fast forward about 24 hours to Sunday evening. I made the glaze in the double boiler and then just had to plate the Bostini. I did 3 different platings.

First, a footed glass dessert dish with the custard in the bottom, a round cake on top, chocolate glaze drizzled over the cake, and a raspberry and mint leaves to garnish. The second plating I drizzled the glaze on a dessert plate, spooned the custard to one side of the plate, and then cut a triangular piece of cake which rested partway on the custard. I finished by drizzling the cake with glaze and again garnished with raspberries and mint leaves. The third plating used a china dessert dish and cup which I received as a wedding gift. I put the custard in the bottom of the cup, added a round piece of cake on top, and then covered the whole thing with chocolate glaze. i topped it off by inserting a square of chocolate in the center. On the plate I stacked raspberries and a mint leaf.

While all of the platings looked good, the one that I had a best photograph of is the footed dessert dish. This is my "official" Bostini Cream Pie!
So, below is the half recipe I followed:

Bostini Cream Pie (adapted from Donna Scala & Curtis Baguley of Bistro Don Giovanni and Scala's Bistro)
makes 5 servings

Custard:
6Tbsp whole milk
4 1/2 tsp cornstarch
1 egg (minus some of the white), beaten
4 egg yolks
1 3/4 cup + 2Tbsp heavy cream
1/4 vanilla bean
1/4 cup + 1 1/3 tsp sugar

Chiffon Cake:
3/4 cup cake flour
1/4 cup + 2Tbsp superfine sugar
1/2 tsp + smidge baking powder
<>INSTRUCTIONS

To prepare the custard:

Combine the milk and cornstarch in a bowl; blend until smooth. Whisk in the whole egg and yolks, beating until smooth. Combine the cream, vanilla bean and sugar in a saucepan and carefully bring to a boil. When the mixture just boils, whisk a ladleful into the egg mixture to temper it, then whisk this back into the cream mixture. Cook, stirring constantly, until the mixture is thick enough to coat the back of a spoon. Strain the custard and pour into 8 large custard cups. Refrigerate to chill.

To prepare the chiffon cakes:

Preheat the oven to 325°F. Spray 8 molds/custard cups with nonstick cooking spray.

Sift the cake flour, sugar, baking powder and salt into a large bowl. Add the oil, egg yolks, orange juice, zest and vanilla. Stir until smooth, but do not overbeat.

Beat the egg whites until frothy. Add the cream of tartar and beat until soft peaks form. Gently fold the beaten whites into the orange batter. Fill the sprayed molds nearly to the top with the batter.

Bake approximately 25 minutes, until the cakes bounce back when lightly pressed with your fingertip. Do not overbake. Remove from the oven and let cool on a wire rack. When completely cool, remove the cakes from the molds. Cover the cakes to keep them moist.

To prepare the glaze:

Chop the chocolate into small pieces. Place the butter in a saucepan and heat until it is just about to bubble. Remove from the heat; add the chocolate and stir to melt. Pour through a strainer and keep warm.

To assemble:

Cut a thin slice from the top of each cake to create a flat surface. Place a cake flat-side down on top of each custard. Cover the tops with warm chocolate glaze. Serve immediately.

To check out how the other Daring Bakers plated their Bostini Cream Pie, or to read about their experiences, you can visit their blogs. Check out the Daring Bakers Blogroll: http://daringbakersblogroll.blogspot.com/.

Sunday, October 28, 2007

Weekend Happenings!

The weekend started out on Friday night with some organizing of my office/craft room. Anyone who has lived with me knows that "neat" and "organized" do not typically describe the rooms I inhabit. This is most certainly true of the craft room/office. The room contains my old desk from when I was a kid (but painted black with glass pulls), D's old filing cabinet, a gate-leg extension table that used to be in my grandparents' house, a chair I pulled out of someone's garbage and painted and recovered, and 3 additional chairs of various origins. In addition to the furniture, there are a bunch of boxes containing wedding gifts that haven't yet been put away, various shopping bags full of stuff that I have to return to the store or out away somewhere, a shopping bag containing gifts I'll be giving for Christmas, about 5 bags of yarn, a huge stack of photographs to sort, a huge box of sorted photographs, and 2 bags, a box, and a stack of scrapbooking stuff. On Friday night I did manage to put some of the stuff away, and I'll put more away once I move a chest down that's currently in the master bedroom.

On Saturday am I headed to a Friends and Newcomers new member coffee. I met some more nice women and learned a few more of the ins and outs of my new town (and the surrounding area). One thing that has been very reassuring about meeting these women is finding out that I'm not the only one who loathes the grocery store in our town. While the prices at the Market Basket are very good, the aisles are narrow, the lines are long, the parking lot is too small, and the produce goes bad too quickly. Everyone seems to shop in neighboring towns either at the Shaws, Hannaford, Stop and Shop, or Donelans. Typically, I do as much shopping as possible at Trader Joe's and then head to Market Basket for whatever I can't find. It drives me nuts every time I go there, but it is much less expensive than the really nice Donelans that is also close to our house.

One of the women at the Newcomers coffee told me about a place called Idylwilde Farms in Acton. She said it was similar to Wilson Farms in Lexington and that they had terrific produce and meats. I knew I had to check it out, so I headed over on Saturday afternoon. Basically, it looks like a big barn, and outside they have stacks of fresh local produce. This week they had tons of different kinds of pumpkins, squash, applies, and multi-colored cauliflower. I picked up a sugar pumpkin and some purple cauliflower. Inside it was a mix of Wilson Farms and Russo's in Watertown. Perfect stacks of fresh and colorful produce, fresh baked goods, a huge cheese section, and a perimeter of staple and gourmet foods. I was able to find all of what I needed for my Daring Bakers challenge, including a vanilla bean and superfine sugar. They also had fresh raspberries which I knew would make the perfect garnish. I also picked up a fresh, natural roasting chicken for Sunday dinner.

Upon coming home from Idylwilde, I started in on my Daring Bakers challenge (you can read about the details of that in my previous post). Meanwhile, D put together 2 more storage shelves in the basement and started tearing up the carpet in the master bedroom so we can get started on our demolition/construction. We're demoing the existing closet and building a walk-in because I have way too much stuff! Were also going to lay down hardwood flooring in the master bedroom and upstairs hall. I can't wait until the room is done and we can start sleeping on the beautiful sheets that my mom gave us for our shower. The colors are so soothing.

Saturday night we went to the Gibbet Hill Grille for dinner to celebrate the 1 year anniversary of our engagement. We had heard about Gibbet Hill from D's cousins, and then saw it on TV Diner where it won the "Platinum Plate" award. Luckily I had called 2 weeks earlier for a reservation because it was parents' weekend at the local prep school and the restaurant was very busy. Gibbet Hill Grille is located in a beautiful refurbished barn on a farm in Groton, MA. There's a fireplace by the bar making it very cosy, and they serve a nice variety of wines by the glass. I had a very nice Pinot Noir and D had the house beer--Gibbet Hill Brew. We were ushered into the dining room promptly at 8pm and started perusing the menu.

There were many fabulous-sounding choices--from gourmet sandwiches to roasted beet salad to all kinds of steaks. We started with PEI mussels which were served in a delicious better/herb broth with a piece of toast to soak up the juices. Being a huge lamb lover (I eat it probably 1 out of every 3 times we go out to dinner), I was happy to hear that they had a rack of lamb special served with braised cabbage and brussels sprouts and roasted sweet potatoes. D had the Arctic Char (he loves all things Icelandic/Scandinavian). My lamb was delicious and I think D was a bit embarrassed when I separated the bones and started gnawing on them after I had finished most of the meat. I had a Malbec that was specially selected to pair with the lamb. After dinner we had port and coffee, during which time we watched and listened as others in the restaurant ran up to the bar to check out what was happening in the Red Sox World Series game.

Sunday was also a moderately busy day for me. D and I organized some things on the shelves in the basement and decided there were some more items we could part with. I also went through my closets and pulled out some stuff to try to consign and some to donate. D mowed the lawn while I worked on a project handblock printing onesies and dish towels (I'll post on this later). Then D and I spent about 1/2 hour laying in the hammock in the warm sun (until the sun went behind the trees and the breeze became too cool).

After "hammock time" I set to work making dinner--chicken with 40 cloves of garlic from the Joy of Cooking. I originally consulted Joy just for the minutes per pound for a roast chicken, but found the garlic recipe which called for lots of dried herbs and garlic. I have a whole deck covered in fresh herbs that we need to eat up so I thought this would be a perfect recipe. Basically, I basted the chicken with olive oil, rubbed under the skin with fresh chopped herbs and salt and pepper, seasoned the cavity and stuffed it with whole fresh herbs (sage, rosemary and thyme) and a quartered lemon. Then I put the chicken in a covered casserole, added some chicken broth and white wine, and all of the peeled cloves of garlic from 3 heads! The covered casserole went in a 375 oven for 25 minutes, then the cover was removed, the temp increased to 450 and the timer set for 35 more minutes of cooking.

While the chicken was cooking I boiled potatoes for garlic mashed potatoes (with the garlic from the chicken). I also cut open 2 sugar pumpkins, saved the seeds on a cookie sheet for roasting later, and roasted the pumpkin pieces. Not sure yet what I'm going to do with the roasted pumpkin. A few weeks ago I made roasted pumpkin risotto which was quite good. I may make that again, or pumpkin soup.

When the chicken was done it smelled heavenly. I removed it onto a platter and added the garlic to the mashed potatoes. I then strained the cooking liquid into a bowl and added some hot chicken broth to thin the sauce down a little. The flavor was great. After dinner I picked all of the remaining meat off the chicken and then put all of the carcass pieces into the slow cooker along with a quartered onion, 3 celery stalks, 2 carrots, the herbs that were in the chicken cavity, and a handful of fresh parsley. This morning I strained that and will make soup with it tomorrow night for dinner.

It was a full weekend that also included watching the Red Sox win the World Series for the 2nd time in 3 years. While I watched the Sox I finished my knitting project for my swap partner. Hopefully I'll get the box in the mail to her tomorrow.

Wednesday, October 17, 2007

Boobie Bake Off!

"What to make for the Boobie Bake Off?" This is a question that has been floating around in my mind for the past few days. The only restriction is that it has to be pink, so...something berry-based? something dyed with pink food coloring? something dyed with beet juice or other red food so it would be more natural than food coloring? what can I make that's chocolate and pink? The answer ended up being somewhat of a compromise...it's cranberry, chocolate, and contains an ingredient that's been dyed pink....Oatmeal Cranberry M&M Cookies!

I took my Grandma Arnold's recipe for oatmeal raisin cookies and adapted it by adding dried cranberries instead of raisins and some special pink breast cancer M&Ms. The result isn't really all that pink, but they sure taste good! The idea of the dried cranberries and chocolate came from some dark chocolate covered cranberries D and I bought in Rockport this summer (in a fudge shop where the guy at the counter surely thought I was nuts because I was vigorously scratching my leg--turns out I had a fierce case of posion ivy...but I digress).

Here's the (approximate) recipe for Oatmeal Cranberry M&M Cookies:

1/2 c. softened unsalted butter
1/2 c. white granulated sugar
1/2 c. packed dark brown sugar
1/2 c. packed light brown sugar
1 egg
1/4 c. water
a generous pour of vanilla extract
1 c. all purpose flour
1/2 t. baking soda
1 t. salt
2 c. quick oats
1 1/4 c. dried sweetened cranberries
1 c. pink M&Ms
3/4 c. chopped walnuts

Preheat oven to 350. Cream butter with sugar. Add egg, water, and vanilla and beat until blended. Add flour, baking soda, and salt and mix until smooth. Add oatmeal and cranberries and beat until combined. Fold in M&Ms and chopped nuts. Drop by rounded tablespoon onto ungreased baking sheets. Bake 15 minutes. Allow to cool on baking sheet for 2 minutes before removing to cool on wire cooling rack. Makes about 2 dozen (depending on how much dough you eat). Note: I used light and dark brown sugar because I ran out of light brown sugar. 1 cup of either light or dark will suffice.

Now, to make them more pink you just use the power of Picassa:


To see the other entries in the Boobie Bake Off and vote for my entry (by making a $1 donation to the National Breast Cancer Research Foundation) just go to Baking Delights or Apron Strings and Simmering Things on November 2nd!

Here's the original recipe for my Grandma Arnold's Oatmeal Raisin Cookies (the best you've ever had):

1/2 c. softened butter (or corn oil margarine)
1/2 c. white granulated sugar
1 c. packed light brown sugar
1 egg
1/4 c. water
1 t. vanilla extract
1 c. all purpose flour
1/2 t. baking soda
1 t. salt
1 t. ground cinnamon
1/2 t. ground cloves (or allspice)
3 c. quick oats
1 1/4 c. raisins
1 c. chopped walnuts

Preheat oven tom 350. Cream butter and sugar. Mix in egg, water, and vanilla. Stir in remaining ingredients. Drop by tablespoonful onto ungreased baking sheet. Bake at 350 12-15 minutes. Wait a minute or 2 before removing from pan.

A side note: I can tell that my grandmother wrote out this recipe after my grandfather had bypass surgery---she restricted all butter from his diet and henceforth most of her recipes called for "Promise" (corn oil margarine) instead of butter!!