Monday, December 31, 2007

Happy New Year!

Happy New Year! 2007 was probably the best year I've ever had. I married the best guy in the whole world, and we moved into our cozy house with a beautiful yard. Hopefully 2008 will be a little less busy than 2007, but equally great.

I took some pictures of a project I did a few weeks ago and hadn't gotten around to posting them (I now have a backlog of things to post). For some relatives for Christmas I put together baskets of amaryllis bulbs. I had meant to do them in November so they would be close to blooming when I gave them for Christmas, but time got away from me.

The bulbs are from Park Seed. I ordered lots of daffodil bulbs from them in the fall and was really impressed with the quality. When I saw they had all kinds of varieties of amaryllis, I had to order some for gifts. I've always liked amaryllis, but the ones you can get in "kits" at the store don't always turn out so well. I ordered 4 types of amaryllis: Mambo, Liberty, Christmas Star, and Baby Star. Then I found some perfect baskets to plant them in at the Crate and Barrel outlet.

To plant the amaryllis, I consulted the instructions that came with them, and also some tips from P. Allen Smith's website. In addition, I used these instructions on the tags I made for each gift. The best trick I used was putting a coffee filter in the bottom of the nursery pots before adding the soil--that way no soil falls out. I also wrapped the pots in aluminum foil before placing them in the baskets.

For the tags, I used pictures I grabbed from the Park Seed website, and wrote a description of the bulb and instructions based on the Park Seed website description and P. Allen Smith's planting tips. Add a little scrpabooking paper and some ribbon, and voila! Gift tags!

Thursday, December 27, 2007

Look what I got!

Look at what my sister gave me for Christmas:It's from the company BlueQ in Pittsfield, MA (where my sister-in-law lives). Check them out. They have terrific products (a number of which I own, like this, this, this, this, and this).

I like their products almost as much as I love Anne Taintor. My mom gave me this book for Christmas, but I already have it (I bought it for myself). Perhaps I'll give it away to one of my blog readers, that is if anyone says they want it...
I have many Anne Taintor items, and I covet just about everything in the collection. I just wish I were as clever as she is!

Thursday, December 20, 2007

Wow, I really am boring!

I just took an online quiz that's supposed to tell me what kind of yarn I would be if I were yarn. guess what? I'm dishcloth cotton! I was really hoping I would be hand-dyed merino, but no, I'm not even a nice cotton sock yarn--I'm dishcloth cotton:

You are Dishcloth Cotton.You are a very hard worker, most at home when you're at home. You are thrifty and seemingly born to clean. You are considered to be a Plain Jane, but you are too practical to notice.

The good news, if you can call it that, is that 27% of the people who took the quiz are also dishcloth cotton. I will agree with some of the statements above, but born to clean I was definitely not (though when I do clean, I really go all out).


In other knitting-related news, I started a new project last night. It's a hat for D. I'm using the "hot head" pattern from Stitch 'n' Bitch, but with 2 strands of Lamb's Pride Worsted instead of the Lambs Pride Bulky which was suggested (I'm using blue flannel, blue boy, and brite blue). I cast on using a 2 needle technique taught to me by the leader of my new knitting group. The project requires 10.5 needles, so I cast on (using long-tail cast on) to 2 needles held together--my 10.5, plus a 7 dpn. The cast on edge ended up being perfect--not too tight and not too loose.


Oh, and I didn't use this last night when I changed colors on my new project (or when I knit my first row after casting on), but I love this tutorial for weaving in ends while you knit. Link Here.


There's also one for continental knitters (which I am learning). Link here.

Update: So that blue hat I was making for D? Well, I only cast on 56 stitches instead of 64 (this is what happens when I knit and watch TV at the same time). So, the hat was tiny, but it looks really cute on my 3 1/2 year old nephew Matthew!

Wednesday, December 19, 2007

Christmas Cookies

In the past 2 weeks I've started making my Christmas cookies. First, I made creme de menthe brownies for a cookie swap. I don't use a recipe, I just make up a batch of fudgie brownies (my grandmother's recipe), ice them with buttercream frosting that's been tinted green and spiked with creme de menthe, and then coat them with chocolate (semi-sweet chips and some butter melted).

The second cookies I made are peanut butter balls. This is a heavily guarded recipe that originally came from my neightbor/my best friend's step-father's ex-wife. My friend Amanda makes these every year and we call them Mandy's Candies. The recipe is out there all over the place in the Internet, so I don't need to post it here and risk upsetting the balance of the universe of my old neighborhood.


Finally, I made sugar cookies. My sister is the queen of cut-out sugar cookies. She makes them for every holiday, bridal showers, etc. She's also a great pie baker. I don't have a lot of patience for rolling out dough (or a lot of time), so I made our grandmother's sugar cookie recipe, rolled it into a log, chilled it for a couple days, and then sliced and baked. They came out approximately round, and I knew that they would look great iced. Here is the recipe:

I also made up a 3/4 batch of my grandmother's christmas cookie icing. Techinically I guess it's royal icing, but I always refer to it as Christmas cookie icing. The icing gets very hard, and I love the combination of soft cookie with a coating of hard icing on top. When I was a kid, my grandmother always made sugar cookies like that. I can still picture her pink-clad santas (I have that cookie cutter now). The santas were pink because she used liquid food coloring and it takes a whole lot of liquid food coloring to dye icing red. These days I use gel food coloring and am able to get more of a red color.

I simply use a ziplock bag instead of a pastry bag for most of my decorating needs. It's easy and disposable--just fill with colored icing and snip a very small hole in the corner. For the holly leaves I did use a pastry bag and tip, but the disposable pastry bag split at the seams before I was finished--I had green icing all over my hands!Here's the recipe for the icing (Doris Arnold is my grandmother):
The recipes are from this cookbook:
I made it a number of years ago by covering a blank book with cut outs from magazines (and the Williams Sonoma catalog). I covered the whole thing with contact paper, and even included measurement equivalents table inside the front cover. I love this little book. It contains my favorite family recipes (banana bread, brownies, cranberry bread, cookie recipes, coffee cake, etc.) as well as some of the recipes I've cut out of magazines. I've always loved cutting and pasting!!!

Monday, December 17, 2007

O Christmas Tree

Here is a collage of some of the ornaments on my Christmas tree. Each ornament has a story. In the top row, the 2nd from the left is an Austrian girl given to be my my mother one year when I was studying Austria for a project in elementary school. The 2nd from the right in the top row is an ornament that belonged to my maternal grandmother--it's very retro! The cows are from my time in Vermont, the sled is from my kindergarten teacher. The lollipop is a craft I made at a friend's Christmas party in elementary school. The Pittsburgh Penguin hockey player belongs to D (his father is from Pittsburgh). Donder has been around as long as I can remember. My sister has Dancer. I believe the 2nd from the left on the bottom row was made by my paternal grandmother, and I'm not sure who made the clothespin doll next to it. So many memories wrapped up in these ornaments, and no doubt each new ornament I receive (or give to D) will also by laden with memory.
Posted by Picasa

Tuesday, December 4, 2007

A wreath for the front door

I'm just starting my Christmas decorating, and appropriately starting it with the entry to our house--a wreath for the front door. I started by buying a $6.99 plain 12" wreath at my favorite local grocery store. I also purchased a roll of wired ribbon at HomeGoods for $2.99. Add in the floral wire I bought for $1.49 at the craft store, and I was all set for my $11.47 front door decoration!

The ribbon I bought is cream-colored with gold trim and pinecones on it. Thus, I decided to decorate my wreath with pinecones. Anina over at Twiddletails had pinecones on her wreaths and they are beautiful.On Saturday, while I was planting my daffodils on the coldest day of the year, 1 day before our first snow was expected, I picked up some pinecones in the yard and some off of the tree at the end of our driveway.

So, I gathered my materials, plus some tacky glue, wire cutters, and scissors and I was ready to start. The first thing I did was place the large pinecones around the wreath so I could get the spacing right (I had to leave a gap where the bow would go). Then, I wired each pinecone to the wreath by wrapping wire around the bottom-most part of the pinecone and wrapping that wire around the wreath. I then wrapped a piece of wire around the middle-to-top part of the pinecone, securing it to the wreath.Then, I glued 3 small pinecones together by first gluing 2 together, letting it dry enough so they stayed in place, and then gluing the third pinecone on. While I waited for them to dry I made my bow.

My mom is an expert at making bows with wired ribbon, but I wasn't able to get her help this time, so I consulted the web. I figured Martha must have instructions, but the best I could fine through her site was how to make a rossette bow using satin (non wired) ribbon. I started out this way (but didn't cut the notches).Then, I needed to add the little "knot" in the center. I made a small loop of ribbon and secured it with wire. Then I used more wire to attach it to the bow.The last step was to make the "tails". I cut a piece of ribbon, notched the ends, folded it in half, and wired it to the back of the bow. Voila! For better instructions on wired-ribbon bow making, check out this site.Here's the finished wreath with the little pinecones glued on. I stuck some single ones on randomly too, trying to make it look like they actually grew on the wreath.And here it is hung on our house!

My wedding cake

Though I'm getting better with my baking, I did not bake this cake. My gorgeous wedding cake was made by Scrumptions in East Greenwich, Rhode Island. The cake is designed after one I saw in Grace Ormonde Wedding Style (incidentally published in my hometown) in their Fall/Winter 2006 magazine. I loved the way the cake looked and knew it would be perfect for my wedding. Once I saw it, I had to have that cake and I didn't care what it would cost!

The cake in the magazine was actually covered in black rolled fondant with pink icing detail. I knew I wanted mine to be chocolate ganache finish instead--tastes much better than rolled fondant, and it matched my color scheme. I called a few bakeries in RI to see who would do the poured ganache. The bakery my sister used for her cake, Fatulli's, couldn't do it, and neither could my caterer. I had seen many advertisements for Scrumptions and figured they would be able to do it. I called and they could!

D and I met with Anna at Scrumptions in December 2006. My goal was to see what they had to offer, and the price, and then go try some cakes at other places too (because who doesn't love tasting cake). Well, after sitting down with Anna and seeing and tasting what they had to offer, I knew I didn't need to try another bakery!

We showed Anna the picture from the magazine and asked her what she thought about doing it in ganache. She loved the idea. Once we had settled that she could do it, we were on to the tasting. For the tasting, she brought us a plate with 6 or 7 different kinds of cake (I remember there was vanilla, lemon, carrot, spice, chocolate, and almond), plus 6 or 7 different icings and fillings (vanilla buttercream, chocolate buttercream, cream cheese, German chocolate, lemon curd, chocolate ganache, and raspberry). D and I had a blast putting all of the different flavors together. I knew I wanted the chocolate ganache finish, so we had to narrow down our choices to fit with that. That meant vanilla, almond, or chocolate cake. And for the filling I was leaning heavily toward raspberry, which D liked too. D suggested lemon cake with raspberry filling and chocolate ganache, but Anna and I talked him out of that. We settled on vanilla cake with raspberry filling, chocolate buttercream icing, and poured chocolate ganache finish! Here's what the inside of the cake looked like after we cut our first piece!

Then we worked with Anna to figure out the size. At that point we were working with a guest list of 164, so we thought 150 servings would be the max we would need (though our budget was based on 125 guests). We could have the caterer cut and serve the top at the reception since Scrumptions bakes you a new top for your 1st anniversary (included in the price of the wedding cake). We settled on a 6" tier, and 8" tier, and a 10" tier with an extra 10" tier to be cut (but not displayed as part of the cake). I was expecting for the price to break our budget, but it wasn't that high. Yes, it was a lot for a cake, but I knew I wanted that cake so I was willing to compromise other areas to fit it in the budget.

The cake turned out beautifully and I received lots of compliments on it based on the way it look. Then people tasted it and the compliments really took off! There were no extra pieces of cake lying on tables at the end of the reception--every slice was eaten! It was so rich and delicious! And, because we only ended up with 125 guests, the caterers didn't need to cut the top of the cake afterall. We were able to enjoy some of that the day after the wedding and more when we returned from our honeymoon.

The only thing I wasn't 100% happy with about my cake was the flowers on top. Don't get me wrong, they're beautiful and my florist did a terrific job, but what I really wanted was a single peony or tuberose so it wouldn't overwhelm the design of the cake.

So, if you're looking for a bakery in Rhode Island for a wedding cake (or other special occasion cake), I very highly recommend Scrumptions. Incidentally, if you're looking for a special occasion cake in the Boston area, I recommend Party Favors in Brookline--their buttercream icing is to die for (and they decorate beautifully). Rosie's Bakery is also very good.

Photographs in this post are by Krzystyna Harber Photography. She's fabulous!

Saturday, December 1, 2007

Daring Bakers: Tender Potato Bread


I bit off more than I could chew in November. First, I signed on to do a blog challenge of organizing my office. Well, that wasn't so successful (though it's much better than it was). Then we celebrated my grandmother's 90th birthday and a week later celebrated by husband's grandmother's 90th birthday. Then it was Thanksgiving! By Thanksgiving night I was totally pooped! But, I still needed to complete my November Daring Bakers challenge!

I started the recipe at about 5pm on Saturday evening (not the best time to start a yeast bread, especially when you hosted 12 people for dinner 2 days earlier). I cooked the potatoes and kind of forgot about them on the stove (I'm a space cadet), so by the time I got to them they had largely become one with the cooking water. Now, I don't have a baking scale (maybe Santa will bring me one?) so I used 3 big potatoes--perhaps that was too many. I measured my potato water and I just about had 3 cups so just added a little extra water to it.

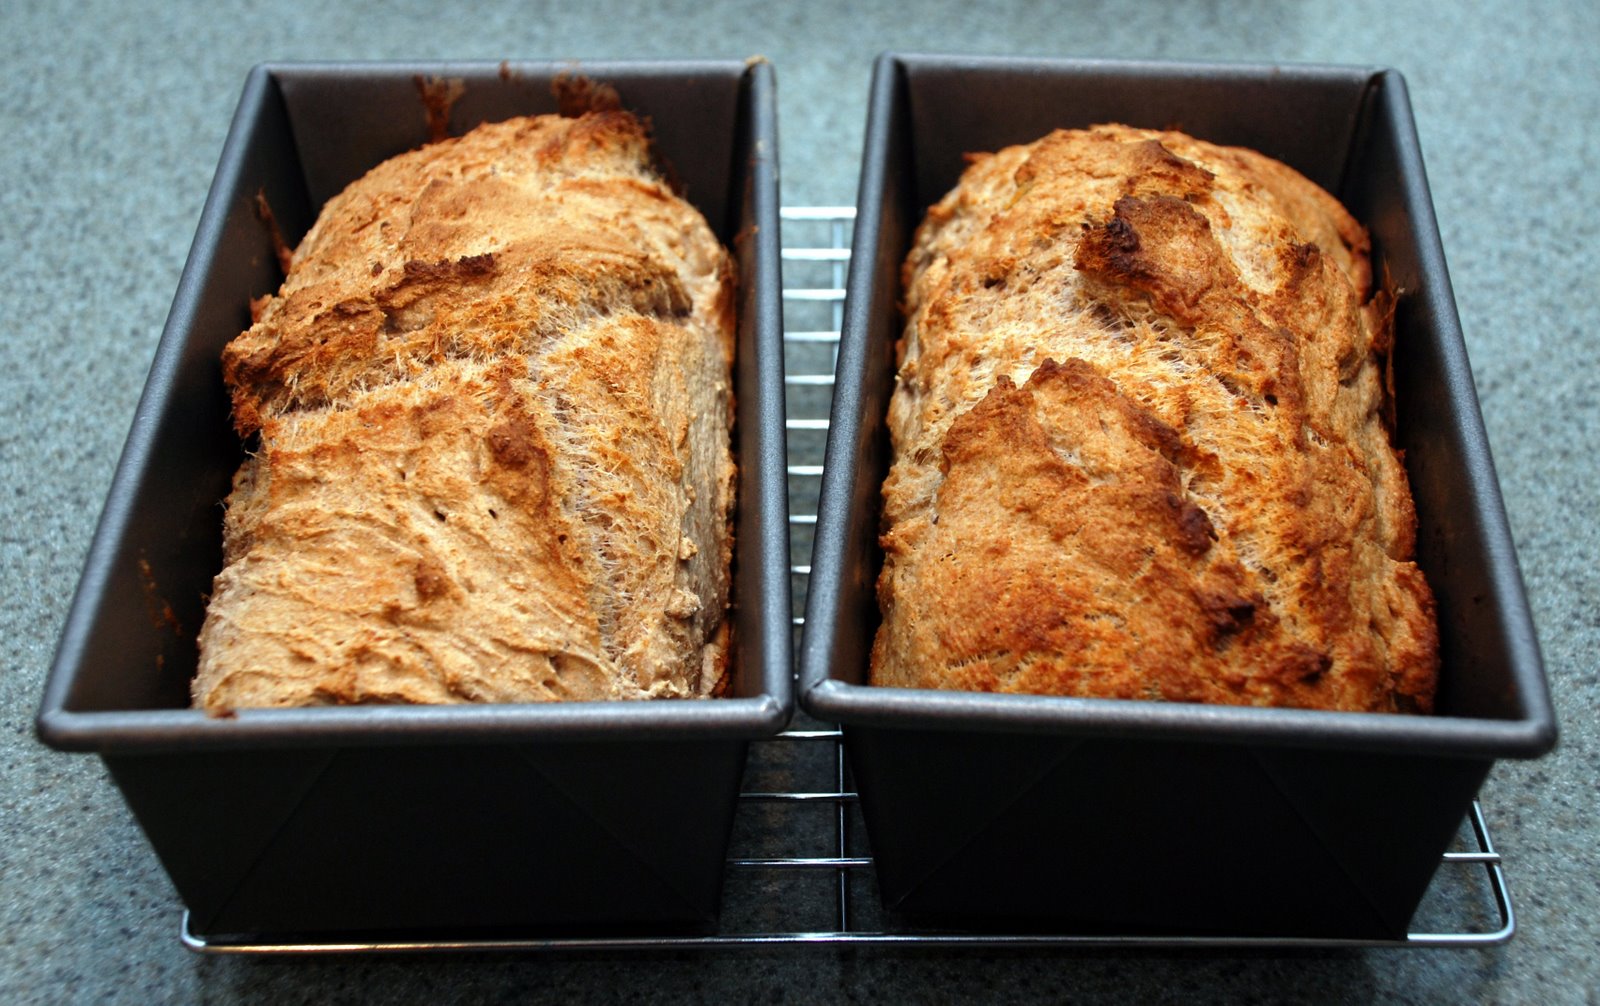
I followed the recipe, adding yeast, all purpose flour, and wheat flour and floured by counter top (I have a beautiful board given to me by D's cousins, but I hadn't
used it yet so needed to oil it before the first use and I just didn't have time for that). The dough was extremely sticky, but I figured this was how it was supposed to be. I kept kneading in flour until I ran out of all purpose flour (I hadn't measured before I started, I just assumed I had enough). The dough was still extremely sticky, so I kneaded in some whole wheat flour--not sure how much. Then I put the dough into a bowl, covered it with a towel, and set it on the mantel of our gas fireplace to rise. Then...I fell asleep!
Yes, in the midst of my bread-making, I fell asleep on the sofa. I woke up around 10 and realized I had to finish the bread! So, back to kneading, and it was still soooo sticky. I definitely think I over kneaded though. It was sticky and I was tired, so I buttered up 2 pans and a muffin tin and threw the dough in them (it was so sticky there was no "shaping" my loaf). Then I stuck the bread in the oven and set the timer for 10 minutes. When the timer dinged I stuck the muffin tin in the oven.

When the bread was done it looked nice, but man did it feel dense! I cut open one of the "rolls" to see what it was like. Okay, but dense. I ate it with some honey.On Sunday I was re-reading the recipe and that's when I saw it: "Cover with plastic wrap and let rise for 35 to 45 minutes, until puffy and almost doubled in volume." Oops! I forgot to let it rise in the pans before baking!!! So a combination of using more whole wheat flour than called for, over-kneading, and not doing the second rise made the bread very dense. But, I am pleased to report it still tasted very good. perfect with jam or honey on it, or to dunk in soup. I also made a very good "Pilgrim Sandwich" with it. Yum!

Lessons learned:
1) Measure all ingredients before starting in case you need to run out to the market
2) When instructions are given my weight, use a scale. Don't guess
3) Don't make a new recipe when you're tired, and don't start so late that you won't finish until past your bedtime
4) Read the entire recipe and make sure you understand the instructions before you begin

Oh, and the "Mrs." apron I'm wearing? That was a gift from my wedding caterer, Fine Catering by Russell Morin. If you need a caterer in Rhode Island or Massachusetts I very highly recommend them!

Here's the recipe if anyone would like to try it:

Tender Potato Bread

From Home Baking: The Artful Mix of Flour & Tradition Around the World
Jeffrey Alford and Naomi Duguid

Makes 1 large tender-crumbed pan loaf and something more (I made 2 8x4 loaves and 1 dozen muffin-tin rolls).

Potatoes and potato water give this bread wonderful flavor and texture. The dough is very soft and moist and might feel a little scary if you’ve never handled soft dough before. But don’t worry: Leaving it on parchment or wax paper to proof and to bake makes it easy to handle.

Once baked, the crumb is tender and airy, with ting soft pieces of potato in it and a fine flecking of whole wheat. The loaves have a fabulous crisp texture on the outside and a slightly flat-topped shape. They make great toast and tender yet strong sliced bread for sandwiches.

Ingredients:

4 medium to large floury (baking) potatoes, peeled and cut into chunks variety of potatoes you might want to use would include Idaho, Russet & Yukon gold

For the beginner I suggest no more than 8 ounces of potato; for the more advanced no more than 16 ounces.

4 cups water (See Note)
1 tablespoon plus 1 teaspoon salt
2 teaspoons active dry yeast
6 ½ cups to 8 ½ cups unbleached all-purpose flour
1 tablespoon unsalted butter, softened
1 cup whole wheat flour

Topping:
For Loaves and Rolls: melted butter (optional)

Instructions:
Put the potatoes and 4 cups water in a sauce pan and bring to boil. Add 1 teaspoon salt and cook, half covered, until the potatoes are very tender.

Drain the potatoes, SAVE THE POTATO WATER, and mash the potatoes well.

Measure out 3 cups of the reserved potato water (add extra water if needed to make 3 cups). Place the water and mashed potatoes in the bowl you plan to mix the bread in and let cool to lukewarm – stir well before testing the temperature – it should feel barely warm to your hand. You should be able to submerge you hand in the mix and not be uncomfortable.

Add yeast one of two ways:

Mix & stir yeast into cooled water and mashed potatoes & water and let stand 5 minutes. Then mix in 2 cups of all-purpose flour and mix. Allow to rest several minutes.
OR

Add yeast to 2 cups all-purpose flour and whisk. Add yeast and flour to the cooled mashed potatoes & water and mix well. Allow to rest/sit 5 minutes.

Sprinkle on the remaining 1 tablespoon salt and the softened butter; mix well. Add the 1 cup whole wheat flour, stir briefly.

Add 2 cups of the unbleached all-purpose flour and stir until all the flour has been incorporated.

At this point you have used 4 cups of the possible 8 ½ cups suggested by the recipe.

Turn the dough out onto a generously floured surface and knead for about 10 minutes, incorporating flour as needed to prevent sticking. The dough will be very sticky to begin with, but as it takes up more flour from the kneading surface, it will become easier to handle; use a dough scraper to keep your surface clean. The kneaded dough will still be very soft.

As a beginner, you may be tempted to add more flour than needed. Most/many bread recipes give a range of flour needed. This is going to be a soft dough. At this point, add flour to the counter slowly, say a ¼ cup at a time. Do not feel you must use all of the suggested flour. When the dough is soft and smooth and not too sticky, it’s probably ready.

Place the dough in a large clean bowl or your rising container of choice, cover with plastic wrap or lid, and let rise about 2 hours or until doubled in volume.

Turn the dough out onto a well-floured surface and knead gently several minutes. It will be moist and a little sticky.

Divide the dough into 2 unequal pieces in a proportion of one-third and two-thirds (one will be twice as large as the other). Place the smaller piece to one side and cover loosely.

To shape the large loaf:

Butter a 9X5 inch loaf/bread pan.

Flatten the larger piece of dough on the floured surface to an approximate 12 x 8 inch oval, then roll it up from a narrow end to form a loaf. Pinch the seam closed and gently place seam side down in the buttered pan. The dough should come about three-quarters of the way up the sides of the pan. Cover with plastic wrap and let rise for 35 to 45 minutes, until puffy and almost doubled in volume.

To make a small loaf with the remainder:

Butter an 8 x 4 inch bread pan. Shape and proof the loaf the same way as the large loaf.

Dust risen loaves and rolls with a little all-purpose flour or lightly brush the tops with a little melted butter. Slash loaves crosswise two or three times with a razor blade or very sharp knife and immediately place on the stone, tiles or baking sheet in the oven. Place the rolls next to the loaf in the oven.

Bake rolls until golden, about 30 minutes.
Bake the small loaf for about 40 minutes.
Bake the large loaf for about 50 minutes.

Transfer the rolls to a rack when done to cool. When the loaf or loaves have baked for the specified time, remove from the pans and place back on the stone, tiles or baking sheet for another 5 to 10 minutes. The corners should be firm when pinched and the bread should sound hollow when tapped on the bottom.

Let breads cool on a rack for at least 30 minutes before slicing. Rolls can be served warm or at room temperature.
Interested in being a Daring Baker? Check out the blogroll site for information on joining the group, and check out all of the other Daring Bakers' blogs!